![Square 1000x1000.png]](https://faq.carts.guru/hs-fs/hubfs/Square%201000x1000.png?width=80&height=80&name=Square%201000x1000.png)
* Note: If you already have version 2 of the Carts Guru Plugin installed, you can
skip steps 1, 2, 3, and 4 and start from step 5.
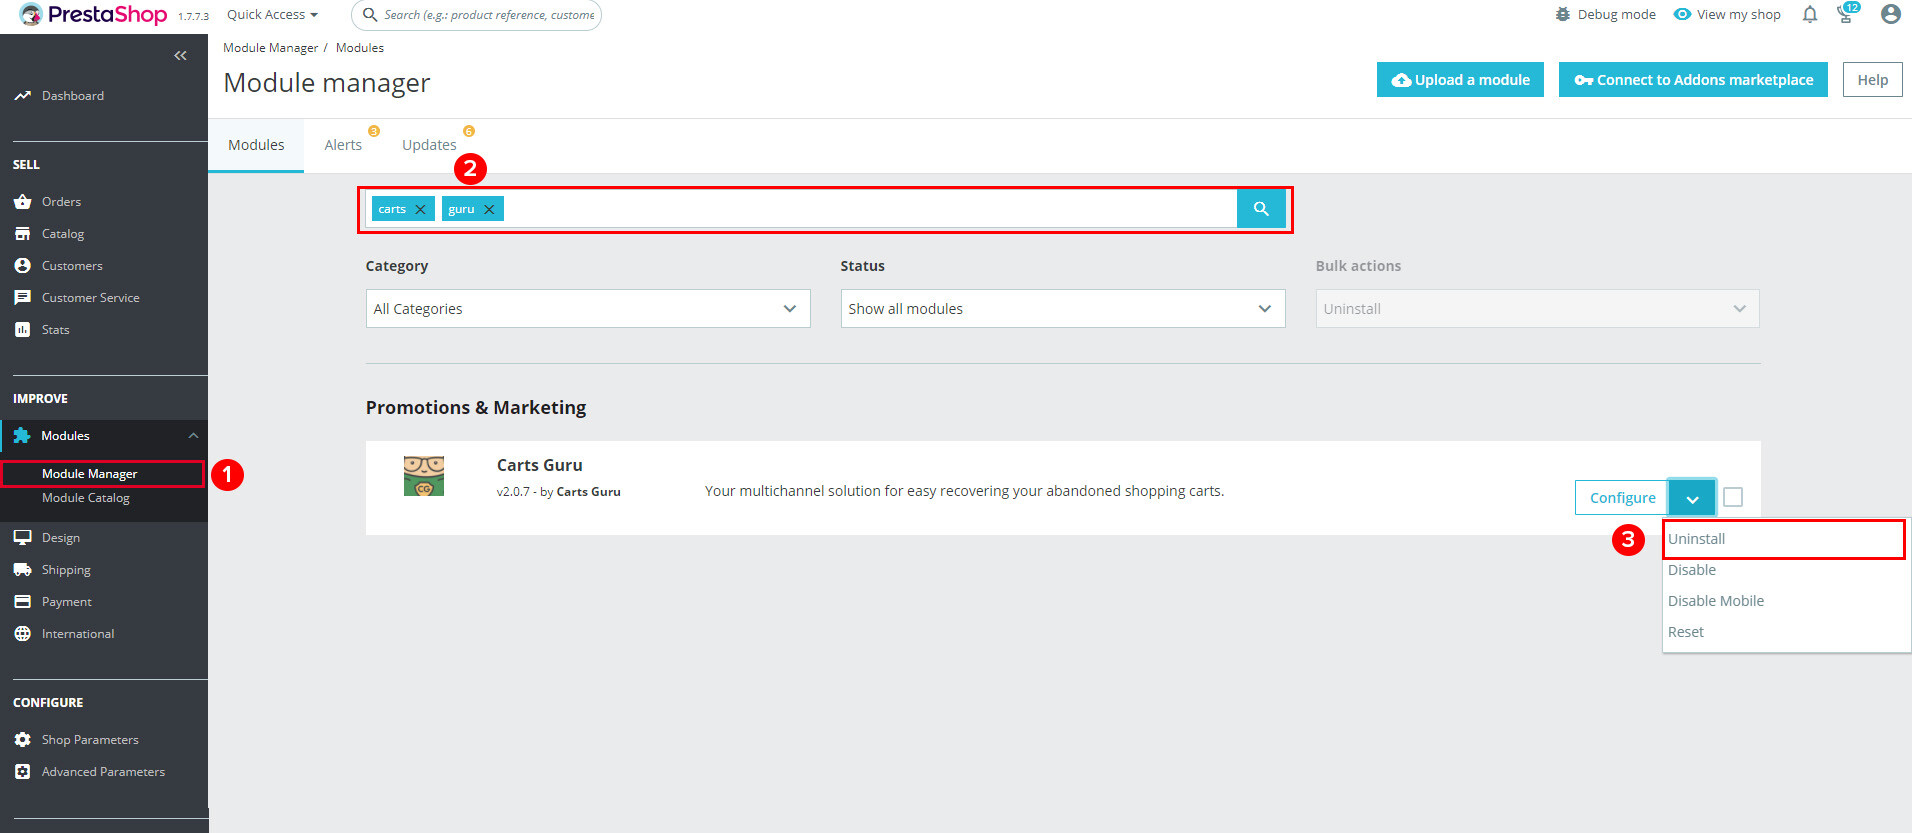
Step 1: Inside your PrestaShop back-office go to: Improve --> Modules --> Modules manager
Step 2: Use the searcher and search for Carts Guru
Step 3: Click on “Configure” and then on “Uninstall”
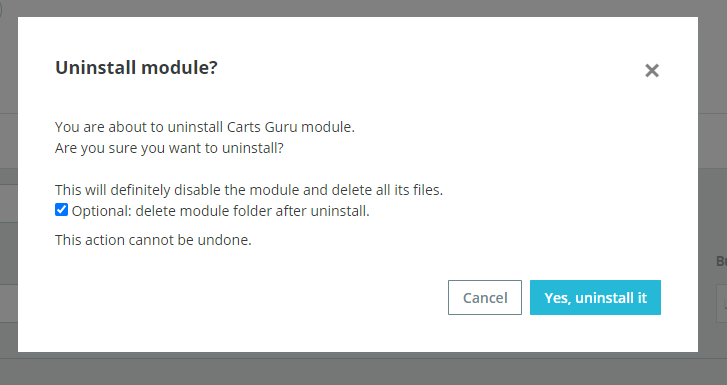
Step 4: Confirm you want to uninstall the module. Click on “Yes, uninstall” and be sure that the option to “delete the module folder after uninstall” is checked.
Step 5: Go into the Advanced Parameters section --> Performance and click on Delete Cache
Step 6: Download Carts Guru plugin here
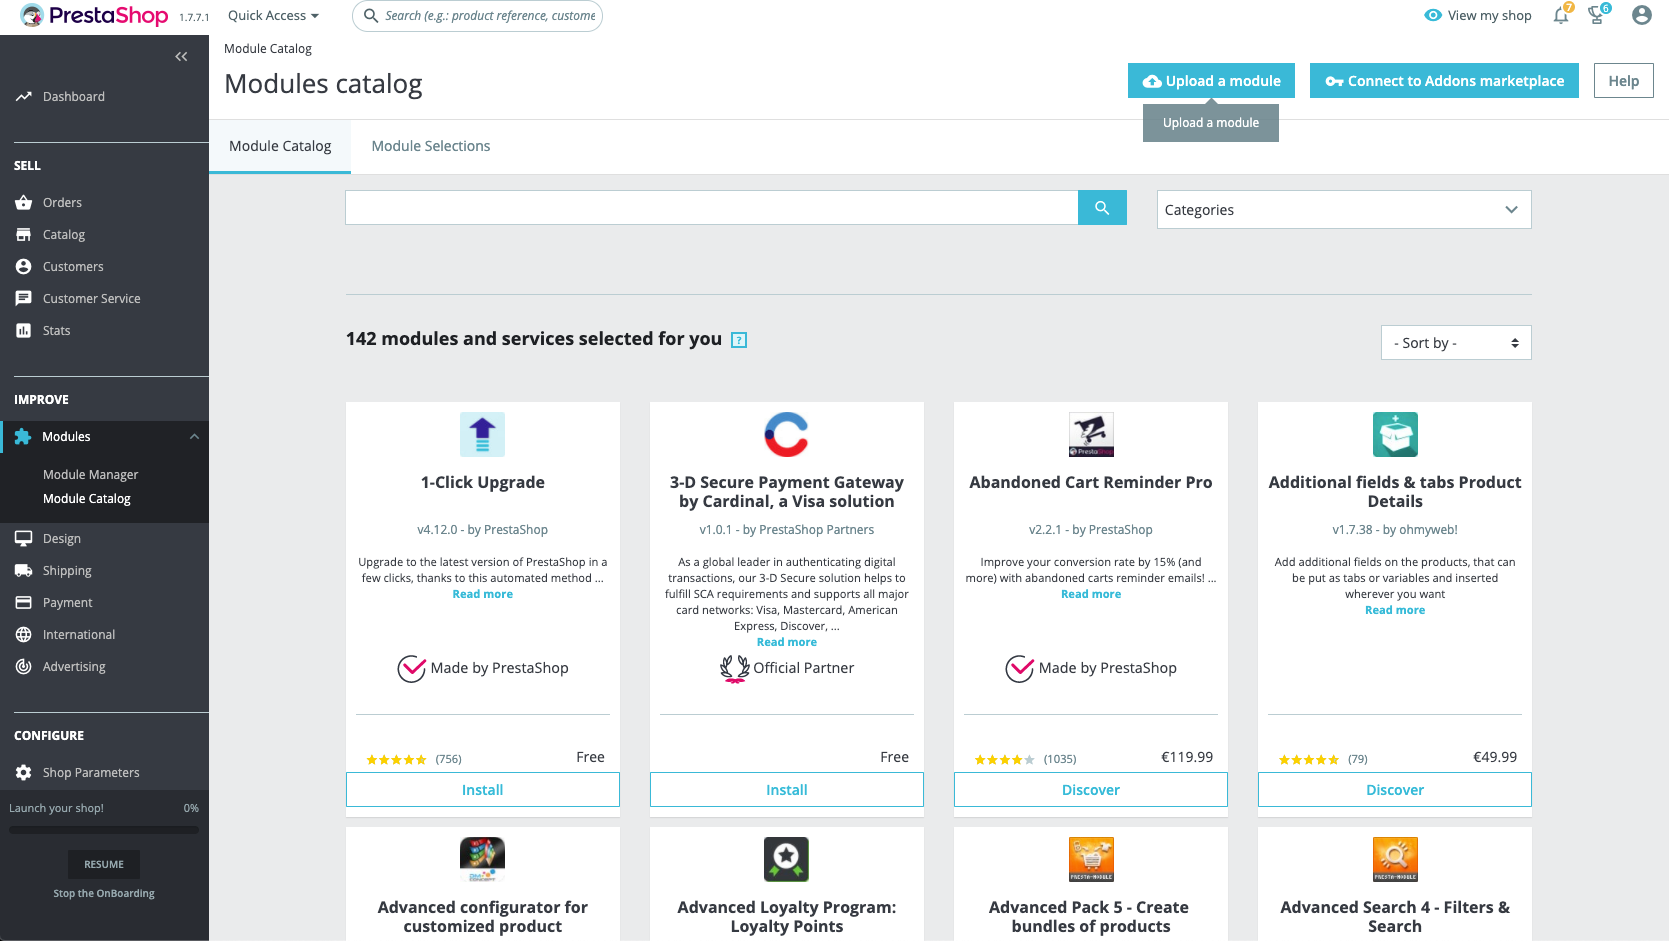
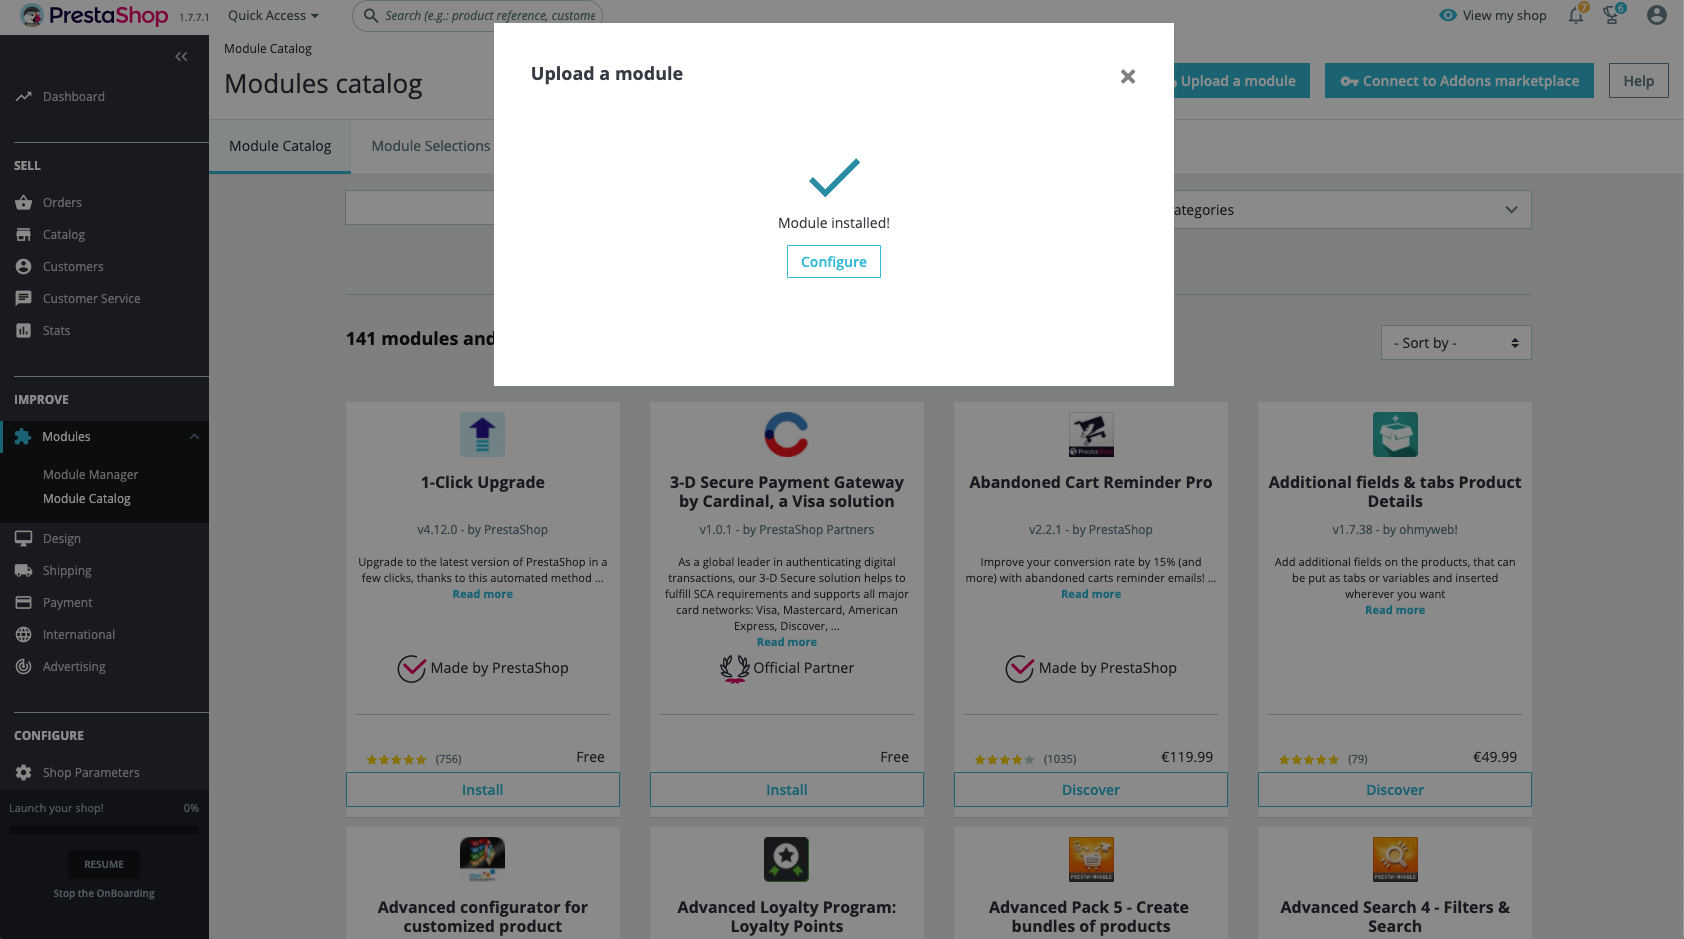
Step 7: Inside your PrestaShop back-office go to Modules --> Module Catalog --> Upload a module
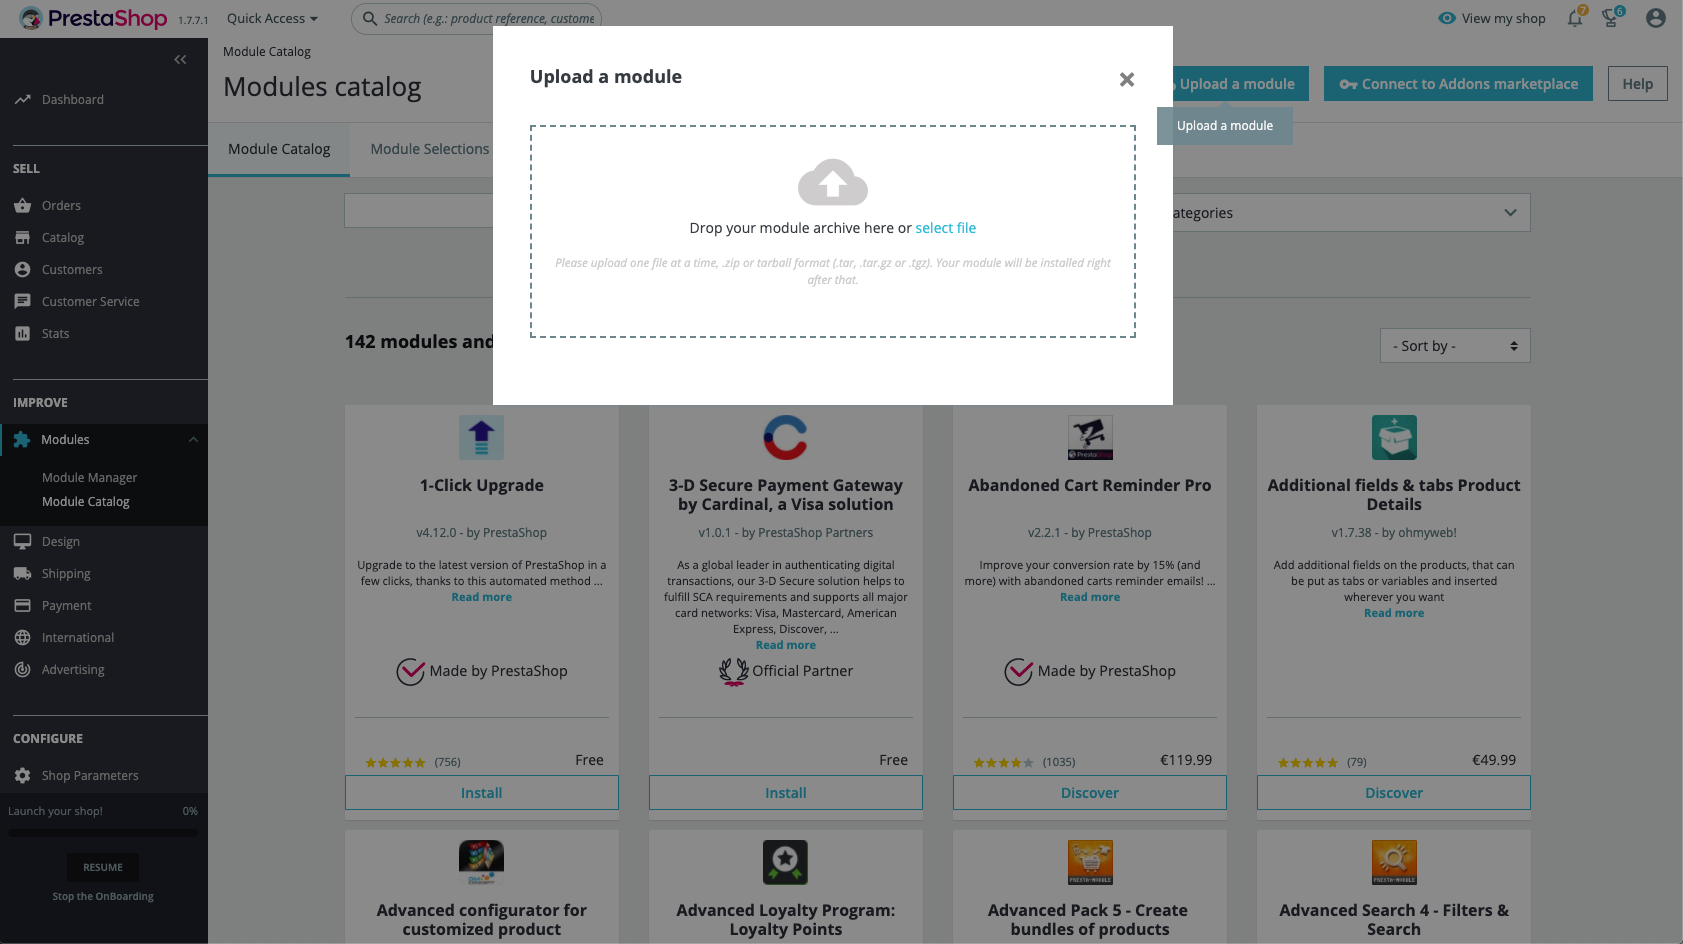
Step 8: Drop or upload the Zip file you exported
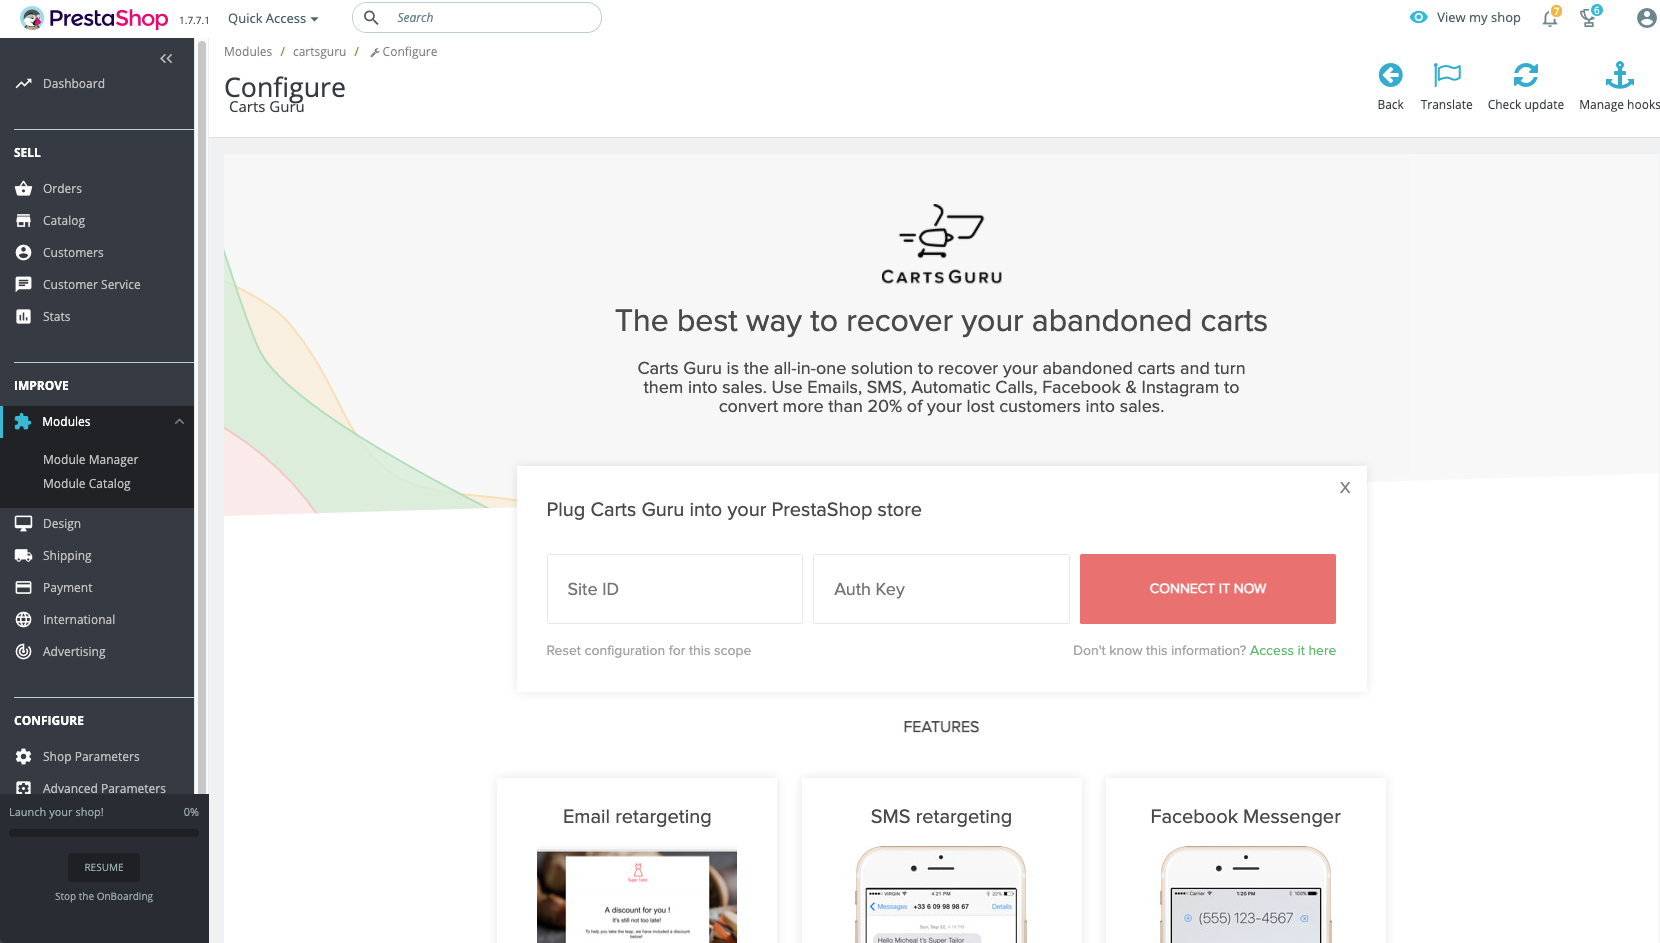
Step 9: Once the module is installed --> Click “Configure”
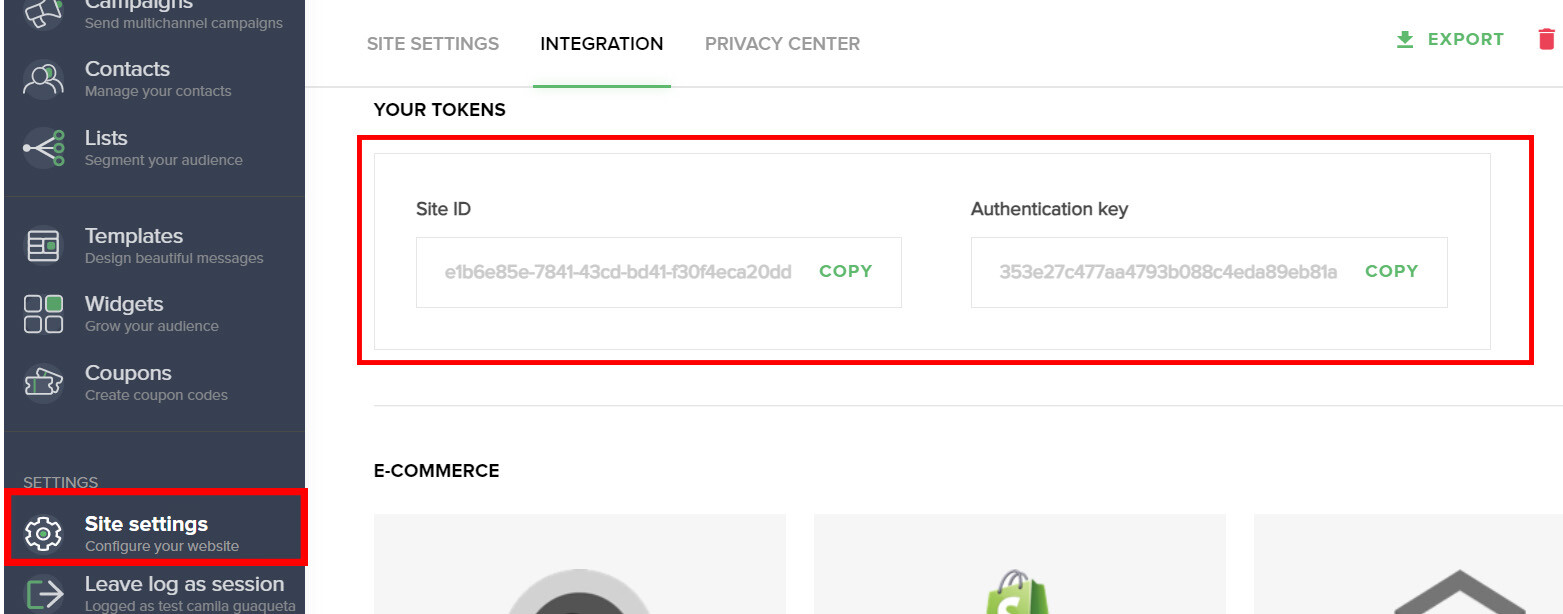
Step 10: Click on “I have an account” and enter your Site ID and Auth Key that you can find inside Carts Guru App* do not leave blank spaces.
* Where can I find the site ID and authentication key? In the Carts Guru back-office: Site settings -> Integration
Step 11: If you entered the Site ID and Auth Key correctly, a green banner saying “Successfully connected” will appear at the top. Go ahead and click “Connect it now” All done! You update it successfully!
Step 12: If you previously added some custom properties to your plug-in, do not forget that after the update, you have to add again those custom properties to the new version of the plug-in. To perform the manipulation, follow the instructions you can find in this document.
Note: your back-office interface might be different from the one shown in the following images depending on the Prestashop version you're using.